How to do them and the benefits for building leg strength and muscle
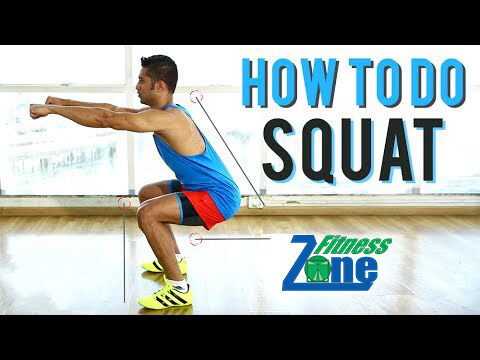
Here’s how to squat properly — and why you should
Squats are the bread-and-butter exercise of lower body strength programs, helping to strengthen and grow muscle in your quads, glutes, hamstrings, hip flexors, lower back and core muscles. But they’re easy to get wrong, and you might not even realize you’re making any mistakes.
Pain in your lower back or joints could indicate that your form might be off, as is “butt winking,” common in beginners or people with limited mobility, causing rounding in the lumbar spine.
But fear not because we’ve drilled down on the squat technique below. Learn how to squat with perfect form, the benefits and common mistakes below.
Squats: Benefits
Squats are a compound exercise that primarily strengthens and builds muscle in your lower body, especially powerhouse muscles like the quads and glutes. Squats take on various forms, from goblet squats to sumo squats, and you could use your bodyweight, resistance bands, the best adjustable dumbbells, barbells or kettlebells.
In short, the options are endless. And other forms, like yogic and Cossack squats, are even used to build flexibility and increase mobility in the lower body, including your back, hips, knees and ankles. Developing more range of motion could help you improve squat depth and maximize the benefits of the exercise.
Squats form a major part of strength training, maximal powerlifting and cardio workouts, so there’s something for everyone. Find out how to test your one rep max here and why it matters for developing your squat potential.
How to squat
Stand with your feet hip or shoulder-width apart. You can position your feet slightly wider
- Point your toes slightly outward at 45 degrees, or forward facing if that’s more comfortable. Engage your core
- Bend your knees and send your hips back as if you’re sitting on a chair directly beneath you
- As you squat down, push your knees outwards so that they track directly over your middle toes and keep the weight distributed through your feet
- Lift your chest, keep looking straight ahead and maintain a flat back. Avoid hunching or rounding your spine
- Lower until your thighs are parallel to the floor, keeping your knees aligned with toes, heels planted and spine neutral, then push through your heels to stand back up.
Squats: Common mistakes
We’ve dedicated whole articles to this one, from limited mobility to lifting too heavy. If you think you could be doing squats wrong, here’s the most common mistake and how to fix it. We’ve also covered butt-winking earlier in this article if that sounds familiar.
But here are the four most common squat mistakes we see summarized below.
Lifting the heels
Limited mobility in the hips, knees or ankles could prevent you from achieving depth in your squat. When this happens, people often shift weight onto the balls of the feet and raise the heels, placing more pressure on their joints.
Keep your heels planted down, creating a tripod foot position. Remember, your feet are the foundation of setting up the squat exercise, so it needs to be solid. Focus on three points of contact — heel, big toe and little toe — distributing the weight evenly across the foot and preventing the knees from turning in.
Knees caving in
As we mentioned, knees turning in is the opposite of what we want to see during squats. Externally rotate the knees by adopting the tripod foot position. Practice turning the knees to track in line with the toes, and notice how your hips open. Now squeeze your glutes to engage them, and reinforce the tripod position by pressing down through your feet.
Butt-winking
Ah, the famous butt-wink. Beginners to the squat or those with tight hips or ankles might find it harder to achieve depth in a squat. Face a mirror side-on, then perform a squat, keeping a close eye on your lower back. If you notice rounding, that’s a butt wink. We cover everything you need to know earlier in this article.
Knees and toes
If you enjoy getting out and about in fitness, chances are, someone has told you it’s “bad” if your knees track over your toes during squats. Untrue. What it really comes down to is flexibility and excessive forward leaning.
If you can lower into a deep squat while keeping your form tight, it isn’t a problem if your knees slightly move past your toes. However, if tracking your knees too far forward and lifting your heels occurs in tandem, it can indicate a lack of flexibility and put stress on your knees.
Besides, everyone is built differently and with varying mechanics. So, focus on lowering directly down toward the floor, sending your hips behind you and hinging at your hips with a tall posture, and avoid leading with your chest; this should help nip excess leaning in the bud.
Was your fitness routine pretty much nonexistent over the summer season?
From holidays, to amusement park visits, to the pool… Summer holidays are go go go go! Combine this with not eating very well, drinking too much alcohol and really having no time to yourself and you’re left feeling drained and far from your best!
Well, time to get excited… It’s back to school time!
This means many hours of uninterrupted ‘ME’ time (lol!). Time to plan on not only using this time to work, but to workout and really making fitness and your self-care a HUGE priority for yourself.
I know that kids activities will soon begin to fill up your calendar so to help fit in some ‘me’ time too, I have come up with some tips for making fitness time a reality so you can be a healthier mama.
MAKE A LIST OF WORKOUTS THAT INTEREST YOU
No one wants to do something that’s boring and working out is no exception to this. In order to keep your motivation up, you need to find things that are fun for YOU.
Whether you can go to a gym or you have to workout at home, there are PLENTY of workouts to choose from.
SCHEDULE YOUR WORKOUTS
Just like anything in life, if you don’t make time for it, chances are it’s not going to happen. At the beginning of your week schedule in WHEN you’ll be working out. Whether it’s first thing in the morning or after the kids are in bed, write it down and stick with it!
IF YOU CAN’T DO A BLOCK, SCHEDULE MINI WORKOUTS
This is something I love to do. Even though I’d much rather go and workout for a hour and be done with it, sometimes that just isn’t possible, so on these days, I like to do a bunch of mini workouts, 10-15 minutes at a time that I can slot into the day. All calories burned will add up so just because you have endless appointments or tons of work to do, don’t let that discourage you from getting a workout in. A few minutes are better that nothing!
GET YOUR FRIENDS INVOLVED
If you have mom friends that are home during the day, get together a group of them (or even just one!) and help to keep each other motivated. Go to a class together or go walk in the park – anything is more fun with friends!
PLAN OUT YOUR MEALS
You plan your kid’s lunches out for school, right? So why should yours be any different! Make a “healthy lunch” board on Pinterest and start spicing up your own lunch routine with some healthy salads, sandwiches or smoothies that will fill your body with the protein and vitamins you need to get through your whole day.
I don’t know about you, but I am thrilled to get back to my fitness routine, and having my kids back in school is going to be the best way for me to get back to being healthier and more fit.
Proper Weight lifting form requires a lot of technique. It is a lot more than just lifting up heavy metal plates. However, if you have been in a gym recently, you have probably noticed a few people with bad form. While it may make you wince, what harm could it really do? Well, actually, bad weightlifting form for whatever lift is being performed could do some serious harm.
1. Prevent Injuries
The main reason that proper weight lifting form is important is to prevent injuries. Improper lifting of heavy weights can easily lead to misaligned tendons, muscles, and joints. When we put our bodies in certain positions under heavy weights, we can cause strains and tears in the tendons and muscles. Additionally, these awkward positions decrease muscle functionality.
If you have to sway to get the weight into position, you should lower the weight you are trying to lift. It is always better to lift lighter weight with the correct form than it is to lift heavier weights with bad form. You should think of this as building up to the weight you want to lift.
Some of the most common injuries caused by improper form are lower back and knee injuries. If you notice pain in these areas after lifting weights, you might want to check your form.
2. Target Specific Muscles
When you aren’t using proper form, you probably aren’t going to be hitting the muscles that you intend to target. In fact, it can be impossible to really work the desired muscles if you have to sway to get the weight where you want it. This can also lead to injuring the muscles that you are trying to target.
3. Ensure Proper Breathing
One underrated aspect of weightlifting that is impacted by bad form is breathing. Proper weight lifting form leads to proper breathing techniques during repetitions. For weight training, this is critical. Proper breathing techniques help generate more force, which reduces severe spikes in blood pressure, aneurysms, and heart problems.
Correct form will help you take air in more easily, and your concentration can be used to focus on the exercise instead of your breath. You should be breathing just before the lift and exhaling as you lower the weight. Try to keep the same pace throughout your set.
4. Reach Goals
If you aren’t using proper weight lifting form, then you probably aren’t working the muscles that you wish to target. This means that you are going to get very little out of your workout. It will take a long time to see your desired results if you aren’t properly working the muscles you intend to strengthen. Bad form causes you to waste a lot of energy on stabilizing your body because your body is trying to protect you from injuries.
Common Form Problems
There are two very common weightlifting form problems. They relate to the core and scapula. Make sure your core is engaged to stabilize the body and protect the spine. You should also be aware of your scapula. A retracted scapula, which occurs when your shoulders are relaxed and down, protects your shoulders and neck during exercise. If you can focus on these two things, you are more likely to lift weights in a safe position.
Different exercises have different risks. It is critical that you know the proper form of all of your exercises to prevent muscle and ligament strains, but keep in mind that a push-up is much different than a squat.
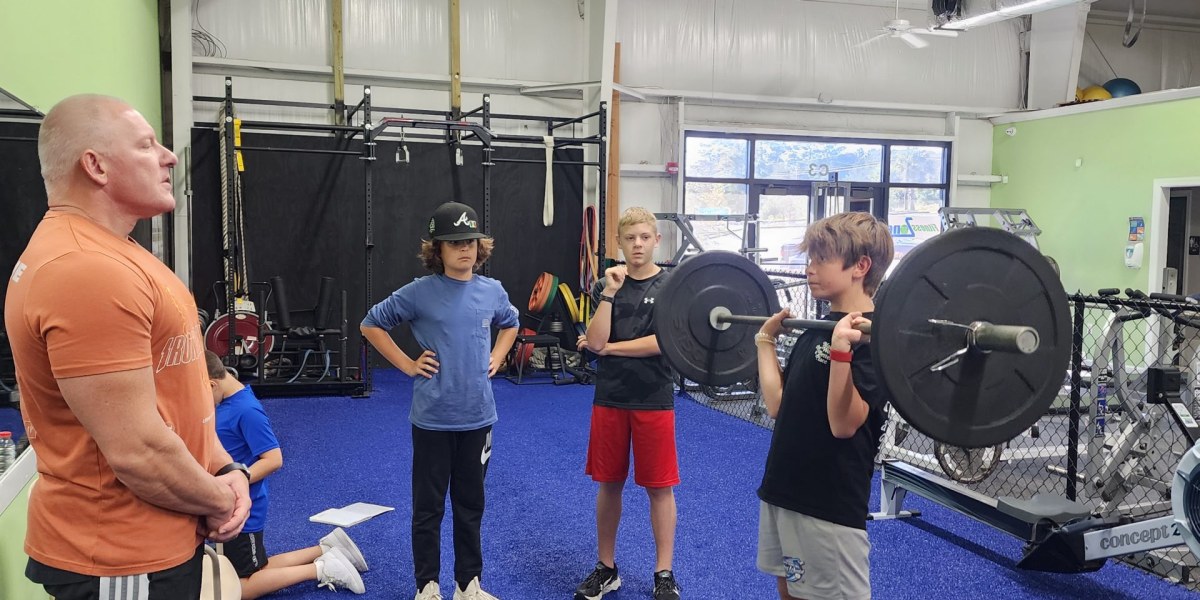
Weightlifting with The Fitness Zone
At The Fitness Zone, our main goal is to teach people proper weightlifting form. While we love having each and every member in our gym, we want to provide life-long skills to everyone who comes through our door, so they are safely lifting weights, whether they are with us or not.
The benefits of weightlifting are numerous, but there are some dangers that arise when proper form isn’t being used. When you work with The Fitness Zone, you can be sure that your trainer will help you work on your forms. This often means retraining the body to use the proper form with every lift.
To get started with the Fitness Zone, give us a call today at 843-663-3900. A member of our staff will help you achieve your fitness goals by starting you out with the right fitness plan for you.

Preventing Injuries in the Gym
Gym-related injuries and strains can occur among people of all fitness levels. Whether you are brand new to exercising or are a frequent flyer at the gym, understanding how to properly work out is essential for injury prevention.
If you’re new to a gym workout or have never worked out before, we recommend getting a session or two with a reputable trainer to walk you through the machines and inform you of what not to do.
A trainer can assist those who are just starting to work out by teaching the correct form and how to prevent injuries. Even one session can be beneficial.
Stretch
While stretching is crucial before and after a workout, there are key differences between your stretch routine before and after exercising. Dynamic stretching before a workout will warm up and loosen up the muscles. Dynamic stretches such as air squats, jumping jacks and lunges will get the blood flowing and muscles moving to prepare for a workout, such as heavy loaded squats.
After your workout is complete, to decrease pressure on the joints, passive stretching is employed to elongate the muscles and to help with relaxation. An example of a passive stretch is lying down on your back with a strap around your foot and pulling your leg up as close to 90 degrees as possible with the knee straight – you will feel a stretch in the back of your thigh (your hamstring). Passive stretching before a workout can lead to injury.
Cool down
Cool down after a workout to let your heart rate calm. If you do interval workouts with a treadmill or stationary bike, cool down by shifting your run to a walk on the treadmill or cycle at a slower pace for about five minutes. Continue with passive stretching at the end of the workout.
Preventative care
A tree analogy for people who are starting to lift weights works great to understanding the importance of preventative care by comparing the human body to a tree. Trees need a strong trunk to grow nice, stable branches just like people need a strong core for lifting heavy weights for arms and legs. Beginners should spend two to four weeks developing a strong core, working the abdominals, glutes and back muscles, before incorporating other lifting exercises in their routine.
Moving up in weight
If you do about 15 repetitions in a weightlifting workout and continue repping with ease, it might be time to increase weight. If you load 50 pounds in a leg press for 15 to 20 reps and can keep going, increase it to 60 pounds. If you can only do about four reps, move it back to the 50 pounds to complete your reps, then rest and start over again. As you get strong, you will be able to move up and keep it at 60 pounds through 15 reps.
Injuries
If you strain a muscle at the gym, stop your workout and put ice on the injury for 15 to 20 minutes. You can ice it throughout the day if you feel sore, then apply a compression sleeve to keep it warm. Visit a physical therapist if you still feel pain after two or three days.
Get educated and get worked on if you need it. You may only need one visit, but a physical therapist can educate you on stretches, proper foam rolling technique and safe exercises to do at the gym.
Powering through the pain
As you get older, arthritis and other conditions may bring discomfort in certain workouts, but as the joints get lubricated, you might feel better. If you feel pain on the first three reps, keep going until you hit the 10th rep. If the pain subsides, the joint just needed lubrication and you can keep exercising. If the pain feels the same or worse by the 10th rep, consult with a physical therapist.
We would never say to power through a sudden pain in a workout.
Compression sleeves
Compression sleeves and wraps provide compression and stability to muscles and joints, keeping them warm during a workout. These are beneficial if you need extra stability or have weakness in the muscles, as well as if you’re recovering from an injury.
We do recommend compression sleeves when you’re recovering, but don’t rely on them forever. Use them at first to get stable and back to normal, then get rid of it.
July, 2023
Most often, when mature people seemingly start to lose their independence, it’s not just because they’ve aged, it’s because they’ve remained inactive throughout their lives. Research tells us that nearly 70% of American adults (i.e. almost 12 million adults) are either sedentary or have low levels of physical activity.
Furthermore, muscle weakness, as a result of years of lack of strength training and exercise, is one of the biggest contributing factors to falls and greatly affects the quality of life for seniors.
But it doesn’t have to be that way.
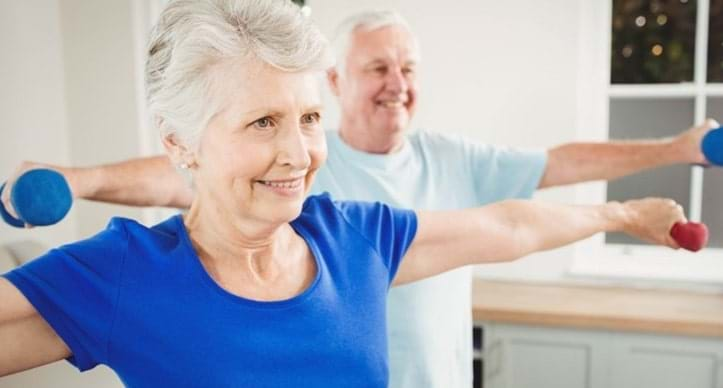
It’s never too late to start exercising
Americans now are living longer than ever, and incorporating daily activity into your life, especially as a senior, is more important than ever.
Even if you haven’t been a regular exerciser for most of your life, with the right fitness plans and trainers, you can establish a tailored exercise program that meets your specific needs – one that you’ll be able to sustain long term.
Granted, your body won’t be what it once was and aches and pains may be more frequent, but the more you stay in shape now, the more you can prevent or slow down the symptoms of ageing, such as bone deterioration, slowing metabolism and weakened muscles.
Before you get started, however, it’s a good idea to check in with your doctor.
It’s all about quality of life as you age
Building your cardiovascular fitness — via activities like walking, running, cycling – is important, but don’t neglect building your strength. You want to stay strong and maintain your muscles so you can continue to live an active, independent lifestyle for years to come.
As a senior, motivation to exercise it’s less about ‘getting ripped’ and more about being able to carry in the groceries and climb the stairs. Sure, it’s not as sexy-a-reason to train, but it’s definitely the more sensible one.
And, by incorporating regular exercise into your daily routine, you may help control blood sugar and insulin levels, reduce your risk of heart disease, improve your mental heath and mood, help keep bones strong, improve balance, and improve your sleep.
Know your body to help avoid injury
No matter what your age, there’s no one ‘right’ exercise program that will suit everyone. It all depends on your body, what you’re capable of and what you enjoy doing.
You need to know your body’s limitations and what to avoid, and that’s where a qualified personal trainer for seniors can really help. They’ll design exercises to help you avoid injury, which can be both a physical and mental set back.
Ultimately, however, it doesn’t matter if you’re lifting weights in the gym, doing outdoor exercises, or walking with friends, anything is better than nothing. The main thing is to focus on what you can do, not what you can’t do, and aim for consistency with your exercise. That’s where the true results lie.
If you could do with some guidance from some of North Myrtle Beach’s most qualified health and fitness coaches or you know that you’ll work harder with the motivation of one-on-one personal trainer, check us out.
The Fitness Zone has experienced, personal trainers and strength and conditioning coaches, we work with people 45 years and up to improve health and wellbeing though outdoor exercise and developing healthy, sustainable eating and lifestyle habits.
Squats & Stripes
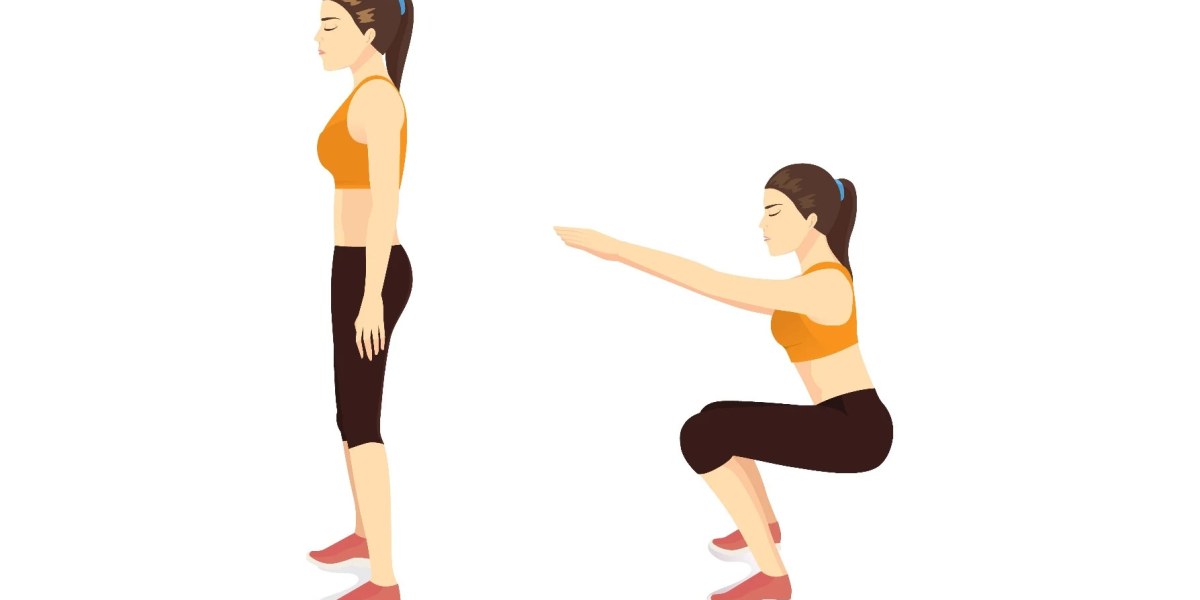
Beginner: Bodyweight Squat
Stand facing forward with your feet shoulder-width apart or slightly wider. Extend your hands straight out in front of you to help keep your balance. You can also hold your hands at chest level or place them behind your head.
Bend at your knees and hips, like you’re about to sit in an imaginary chair. Keeping your chest lifted and your spine neutral, lower as far down as you can.
Make sure to keep your knees over your ankles and press your weight back into your heels.
To rise, push through your heels to bring yourself back to standing position. Do this squat 10 times. (For a greater challenge, place a loop band on the legs just above the knees).
Side view of a woman standing, then extending her arms out straight and bending into a squat position
Moderate: Jump Squat
Stand facing forward with your feet shoulder-width apart or slightly wider. Extend your hands straight out in front of you to help keep your balance.
Bend at your knees and hips, like you’re about to sit in an imaginary chair. Keep your chest lifted and your spine neutral.
On the way up, explode up through your toes into a jump reaching your arms up overhead.
Land softly, immediately dropping back down and exploding back up again. Do this jump squat 10 times.
Side view of a woman standing, then lowering into a squat, and then jumping up in the air
Advanced: Squat with Kickback
Stand facing forward with your feet shoulder-width apart or slightly wider. Drop down into a squat position.
As you come up, lift your right foot off the ground, squeezing your glute and kicking your leg back behind you.
Lower your right foot back to the ground, squat down again, and repeat. Do this squat with kickback 10 times before switching to kick your left leg back. (For a greater challenge, place a loop band on the legs just above the knees).
#daypass #Fitness #fitnessclub #womanfitness #gym #healthyliving #fitnesscenter
Red, White, & Glutes
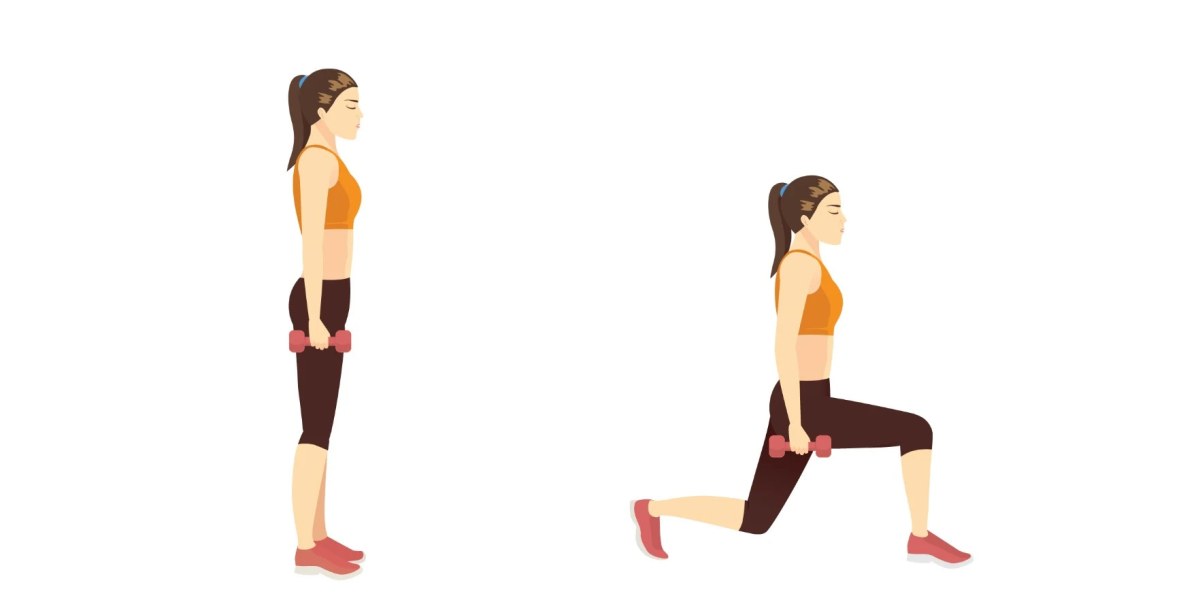
Beginner: Forward Lunge
Stand tall holding a pair of dumbbells by your sides (palms facing in) with your feet hip-width apart. (If it is too challenging, you can do this lunge without the dumbbells).
Keeping your chest up, shoulders back, and back flat, take a large step forward with your right foot. Lower your body until your front thigh is parallel to the ground and your rear knee is bent 90 degrees.
Pause, and then reverse the movement to return to starting position. Do this forward lunge with the right foot 10 times. Switch and then step forward with your left foot. (For a greater challenge, wrap a loop band around the legs just above the knees).
Woman holding dumbells at side standing, then moving into a lunge
Moderate: Curtsy Lunge
Stand tall holding a pair of dumbbells by your sides (palms facing in) with your feet hip-width apart. (If it is too challenging, you can do this lunge without the dumbbells).
Take a big step back with your right leg, crossing it behind your left. Bend your knees and lower your hips until your left thigh is nearly parallel to the floor.
Keep your torso upright and your hips and shoulders square. Return to starting position.
Then repeat on the other side. This completes one rep. Do this alternating curtsy lunge 10 times. (For a greater challenge, wrap a loop band around the legs just above the knees).
Advanced: Jump Lunge
Take a large step forward with your right foot. Lower your body until your front thigh is parallel to the ground and your rear knee is bent 90 degrees. Prepare to jump by leaning slightly forward and contracting your core muscles.
Explosively drive both feet into the floor and launch your body upward, fully extending your knees and hips. As you jump into the air, bring your feet quickly together and switch positions as you begin to land.
When you land, your forward knee should be over your forward foot. Avoid remaining on the toes of the forward foot. Keep your hips back and allow your knees to bend deeply to absorb the landing. Don’t lock your knees.
Drop to a deep lunge position as you prepare to start the next jump lunge. Do this jump lunge 10 times.
#fitnesscenter #womanfitness #Fitness #healthyliving #daypass #fitnessclub #gym
Independence Row
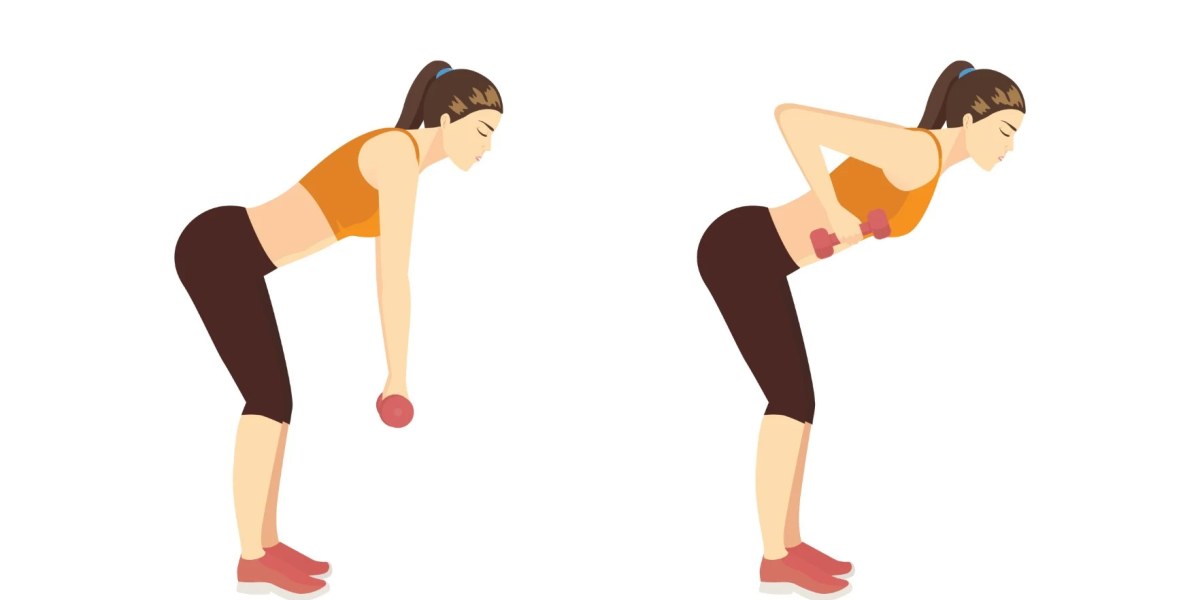
Beginner: Bent Over Row
The starting position for this move is similar to that of a deadlift, with hinged hips and a flat back. Hold a dumbbell in each hand and stand with feet hip-width apart.
Hinge at the hips until your chest is parallel to the floor and back is flat. Lower dumbbells to the floor until arms are straight.
Squeezing the shoulder blades together, slowly bend your elbows to pull the dumbbells back toward your hips.
Make sure to keep your elbows tight next to your body. Return to starting position. Do this bent over 10 times.
Moderate: Single Leg Bent Over Row
Holding a dumbbell in each hand, stand with feet hip-width apart.
Hinge at the hips until your chest is parallel to the floor and back is flat.
Lift one foot off the ground and extend it straight back. Lower the dumbbells to the floor until elbows are completely straight. Make sure to pull the shoulders down and away from the ears.
Squeeze your shoulder blades together, draw your belly button toward your spine, and slowly bend your elbows to pull the dumbbells back toward your hips. Return to start. Do this single leg row 10 times before switching legs.
Advanced: Plank Row (Renegade Row)
Place two dumbbells shoulder-width apart on the ground. Start in a high plank position, with shoulders stacked over the hands, each hand gripping a dumbbell, feet hip-width apart.
Pull your shoulders down and away from the ears, and slowly bend one elbow back, keeping arm close to your side as you pull the dumbbell up toward your hip.
Return to starting position, placing the dumbbell down softly.
Do this 10 times before switching to the opposite arm. #fitnessclub #womanfitness #fitnesscenter #Fitness #healthyliving #daypass #gym
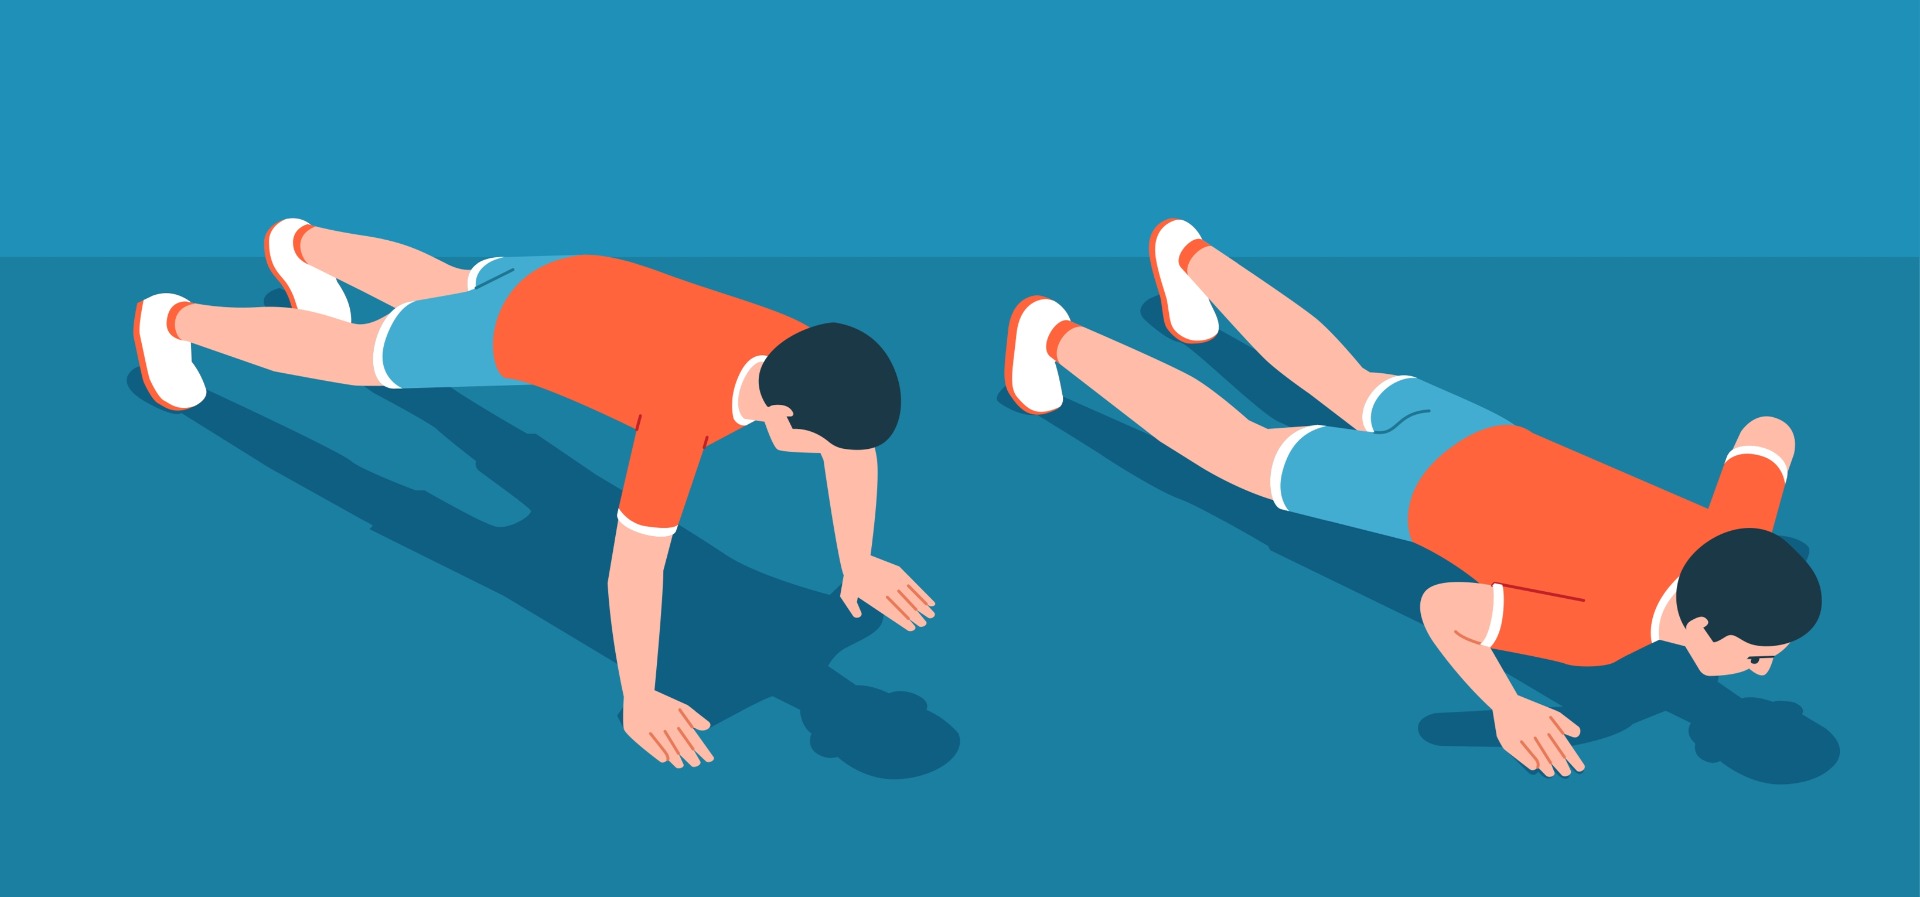
Star Spangled Push-Ups
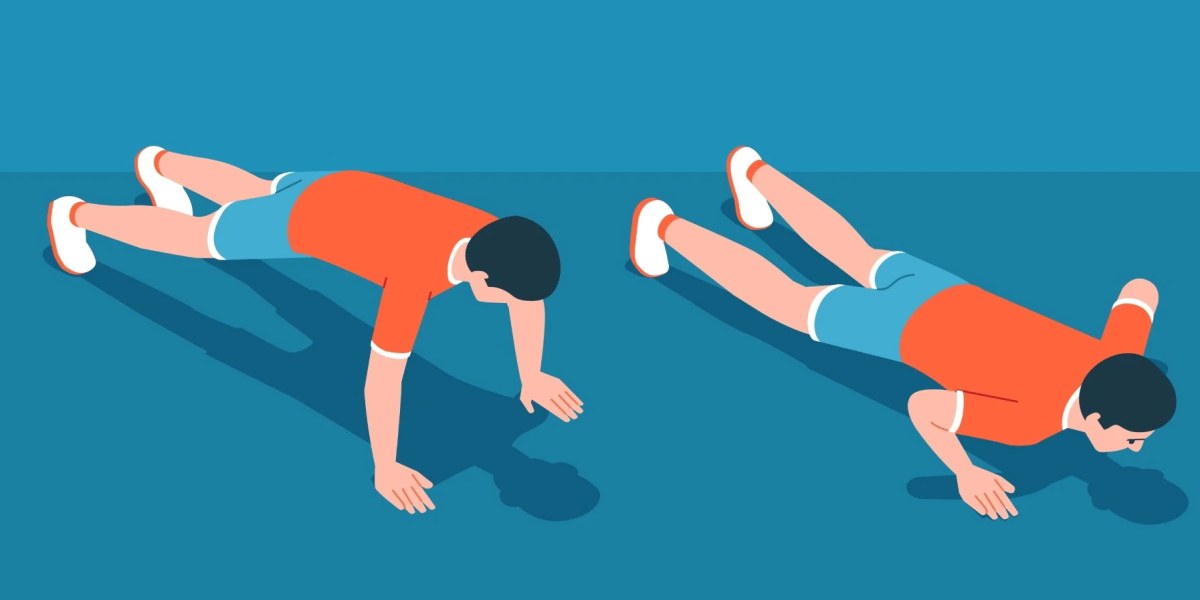
Beginner: Wide Hands Push-Up
- Start in a plank position with your hands wider than shoulder-width apart.
- Slowly bend your elbows out to the side as you lower your body toward the floor. Pause when your chest is slightly hovering from the floor.
- Engage your core as you press into your hands to lift your body back to the starting position. Do this push-up 10 times. (You can also wrap a resistance band around the back and hold an end in each hand for a greater challenge).
Moderate: Diamond Push-Up
- Start in a plank position, with your hands together and angled inward at 45 degrees. Your index fingers and thumbs should touch to form a triangle (or diamond).
- Keeping your elbows tight to your body, bend them to lower your chest toward the floor.
- Engage your core as you press into your hands to lift your body back to the starting position. Remember to keep the triangle directly below your chest throughout the movement. Do this diamond push-up 10 times. (You can also wrap a resistance band around the back and hold an end in each hand for a greater challenge).
Advanced: Staggered Hands Push-Up
- Starting in a plank position, move one hand forward and the other back so they’re offset by about 6 to 12 inches.
- Slowly bend your elbows as you lower your body toward the floor. Pause when your chest is slightly hovering from the floor.
- Engage your core as you press into your hands to lift your body back to the starting position.
- Keep your elbows tight to your body throughout the movement. Do this staggered push-up 10 times. Switch the fore and aft positions of your hands to work the other side. (You can also wrap a resistance band around the back and hold an end in each hand for a greater challenge).
Firework Deadlifts
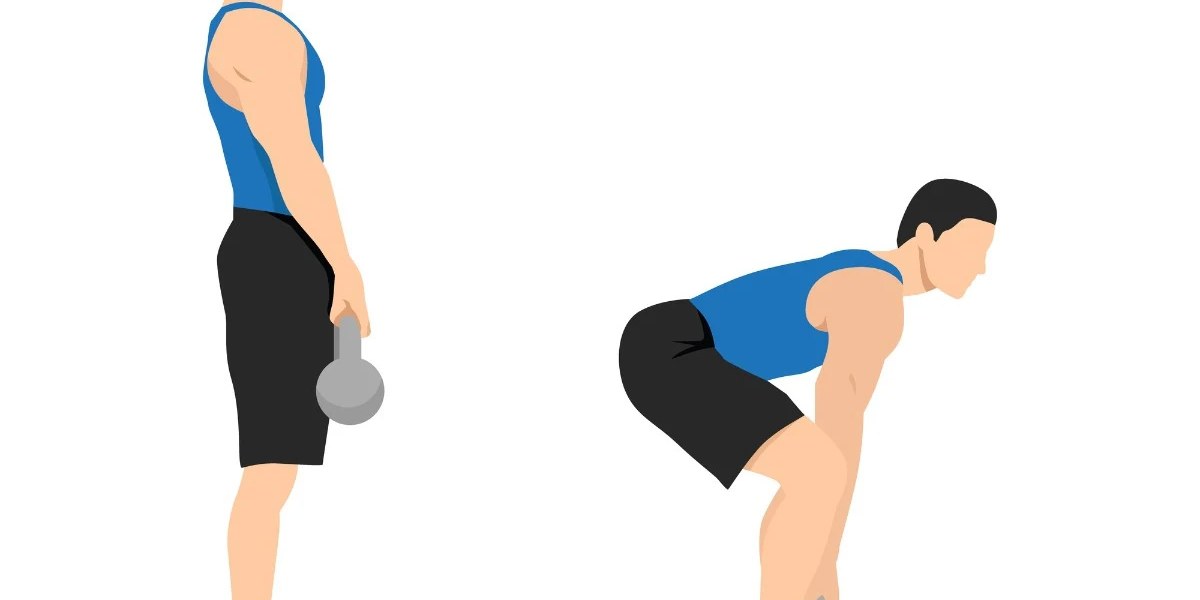
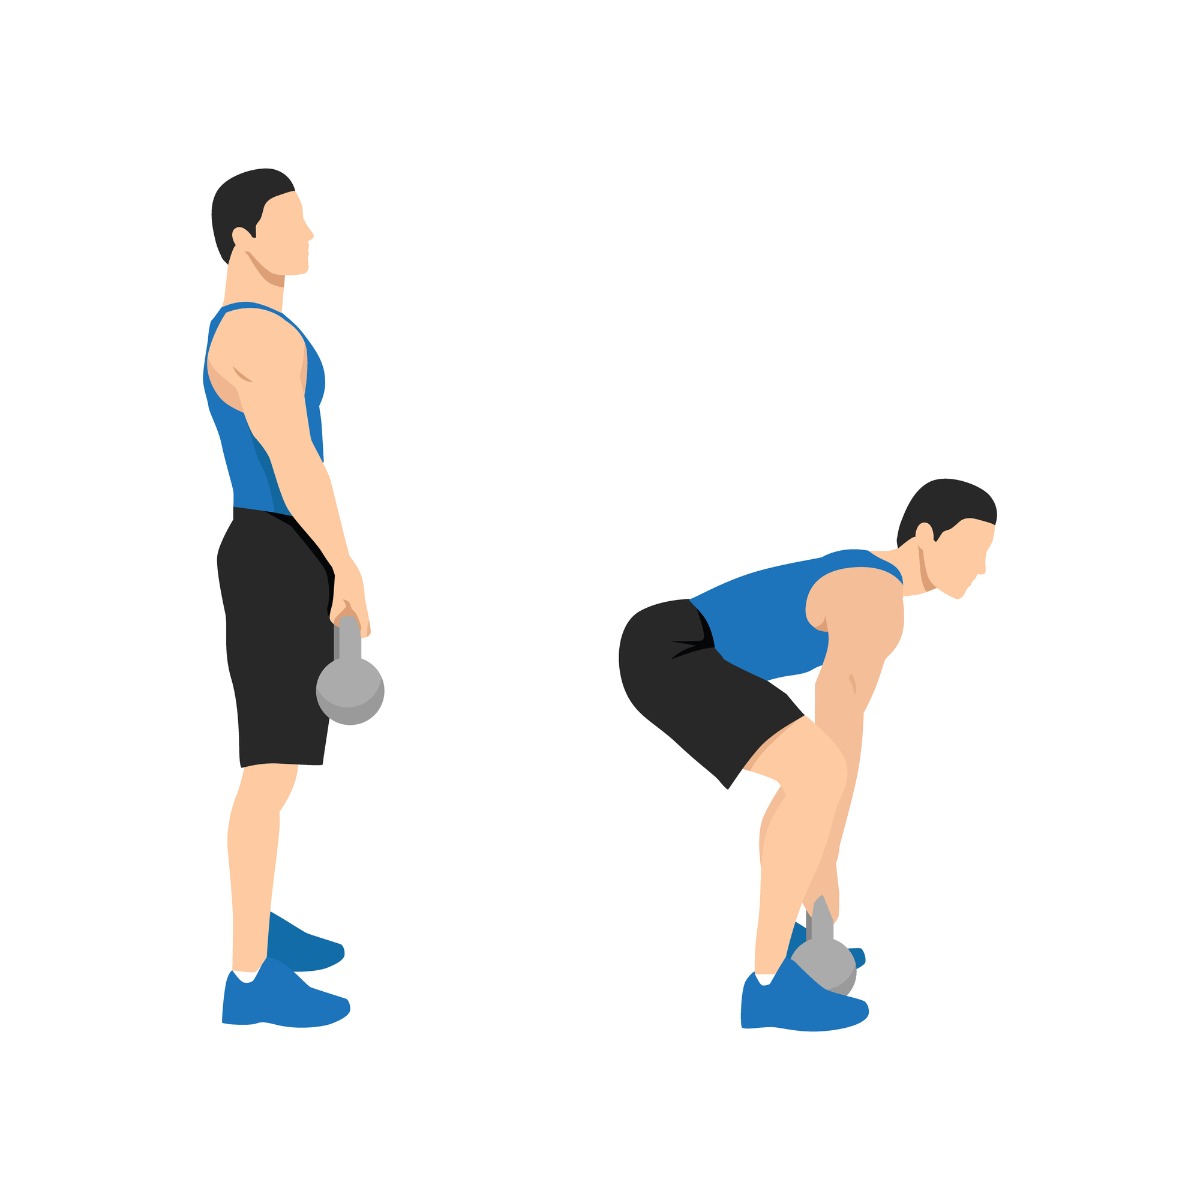
Beginner: Romanian Deadlift
- Stand with your feet hip-width apart, knees slightly bent. Hold a kettlebell at your thighs. (You can also use dumbbells if you don’t have a kettlebell).
- Hinge at the hips, bending slightly at your knees. With your back flat and torso parallel to the floor, lower the weight to reach your shins.
- Keeping your core tight, push through your heels to stand up straight. Keep the weight close to your shins as you pull up. This completes one rep. Do this deadlift 10 times.
Moderate: Kickstand Deadlift
- Stand with your feet hip-width apart. Hold a dumbbell or kettlebell in each hand.
- Place one foot a foot-length in front of the other. Your stance should be staggered.
- Hinge at your hips to lower your body. With your back flat and torso parallel to the floor, lower the weights to reach your shin of your front leg.
- Keeping your core tight, push through your front heel to stand up straight. Keep the weights close to your shins as you pull up.
- This completes one rep. Do this kickstand deadlift 10 times before switching legs.
Advanced: Single RDL
- To start, stand with your feet together. Hold a dumbbell or kettlebell in each hand.
- Shift your weight to your right leg. While keeping a slight bend in your right knee, raise your left leg straight behind your body. Hinge at the hips to bring your torso parallel to the floor and lower the weights toward the floor.
- At the bottom of the movement, your torso and left leg should be almost parallel to the floor, with the weight hovering a few inches off the ground.
- Keeping your core tight, push through your right heel to stand up straight and pull the weight back up to the starting position. Bring your left leg back down to meet your right.
- This completes one rep. Do this single RDL 10 times at a slow and steady pace before switching legs.
Recent Comments